配置
操作系统 :虚拟机 ubuntu 16.04
内存 :12G
硬盘 :150G
CPU :4核
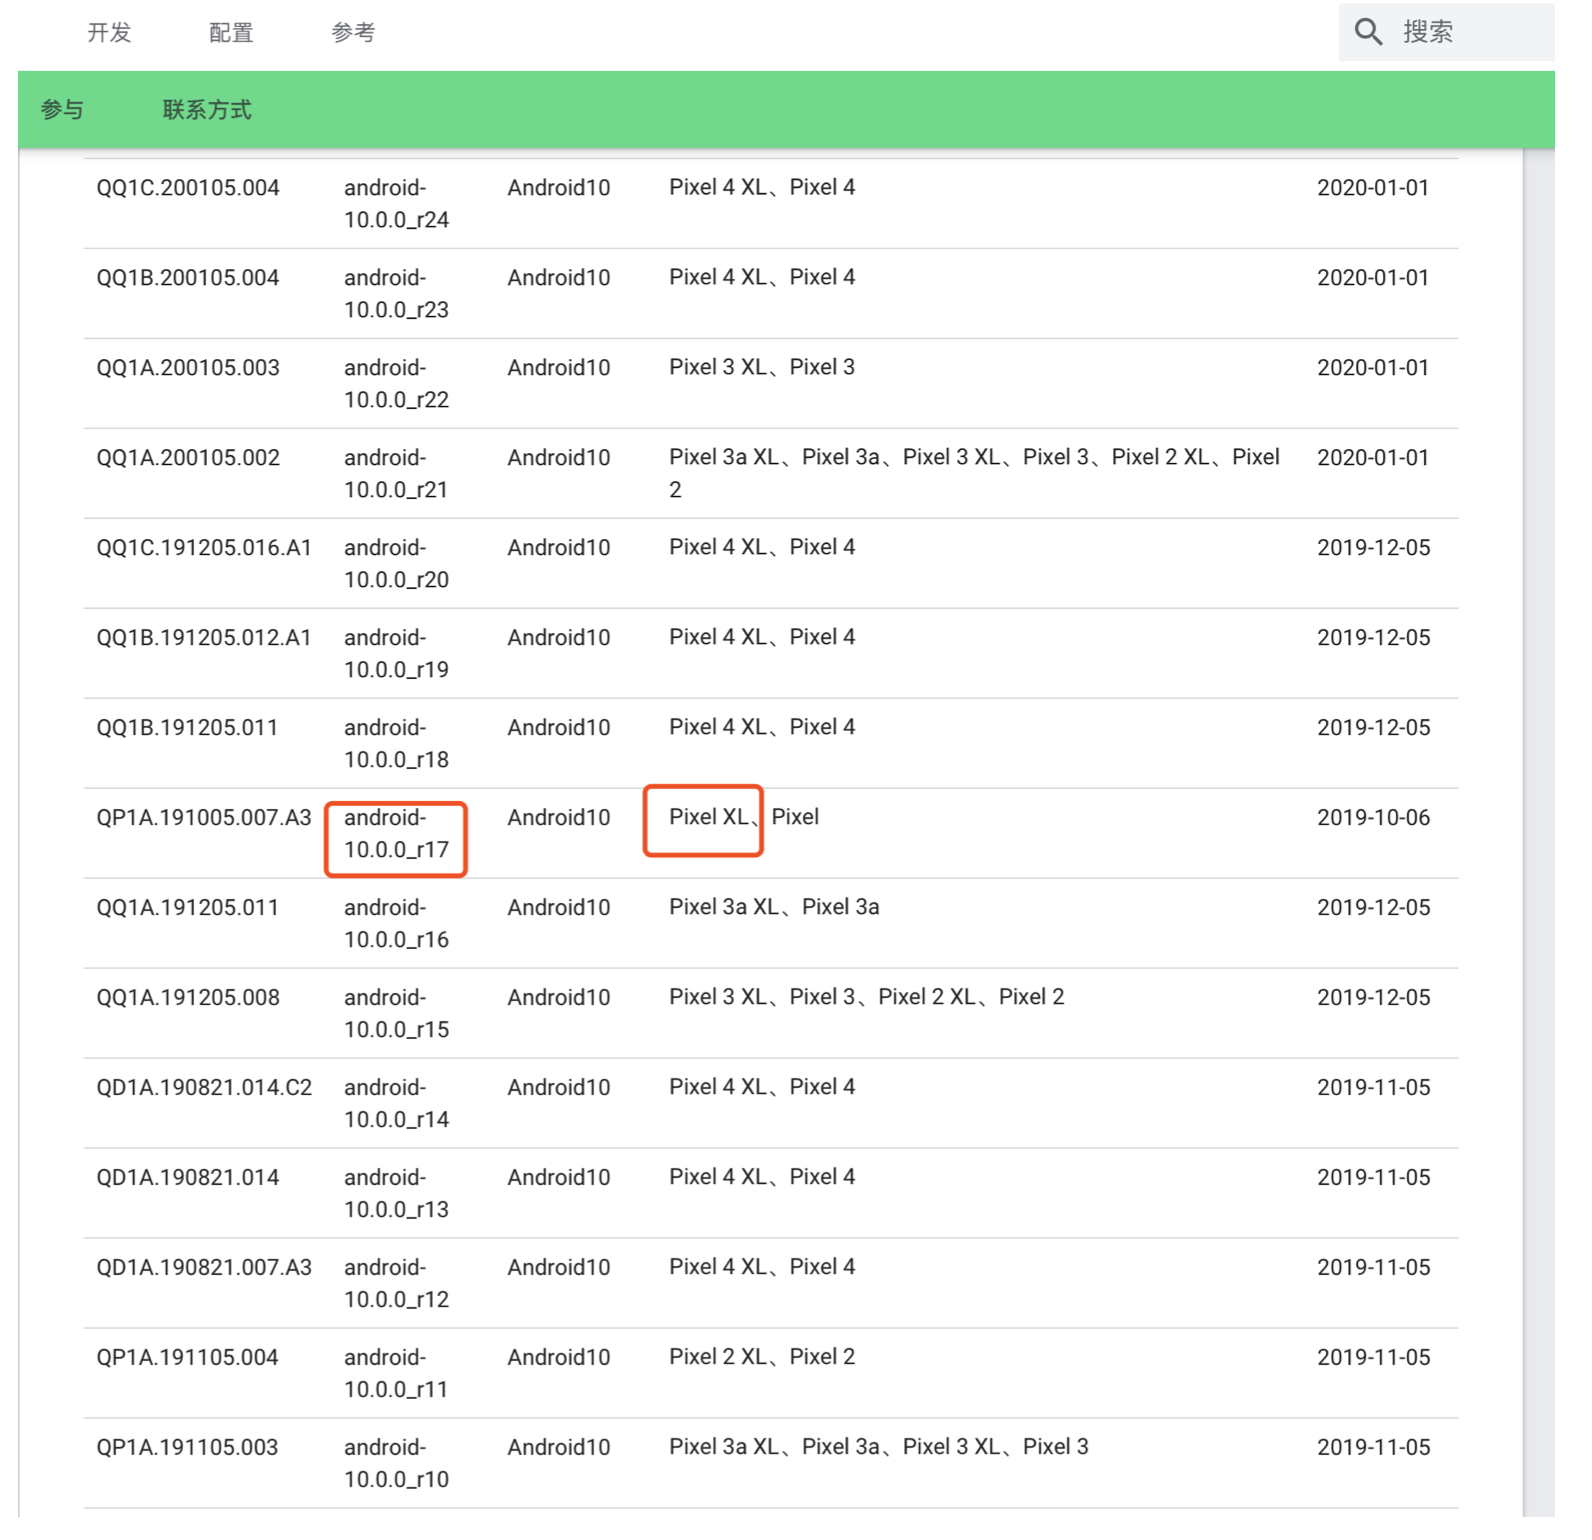
编译过程 1. 源码分支获取 根据手机型号下载对应的版本,通过以下网站获取pixel XL android 10版本的源码标记 android-10.0.0_r17
1 https://source.android.com/setup/start/build-numbers#source-code-tags-and-builds
2.下载android源码 repo
1
2
3
4
5
6
7
8
sudo apt-get install git-corebin /bin bin /repobin /repo
在~/.bashrc里添加
1 2 'https://aosp.tuna.tsinghua.edu.cn/git-repo'
3. 同步代码 3.1 第一种方式 1 2 3 cd ~/work/sources/android-10.0 .0 _r1710.0 .0 _r17
参数介绍:
1 2 3 4 5 6 7 8 9 10 11 12 13 14 15 16 17 18 19 -c, --current-branch fetch only current branch from server.
3.1 第二种方式(未尝试此方法不知道是否可行) 下载源码的初始化包(加速源码下载) 大约60G
1 wget https://mi rrors.tuna.tsinghua.edu.cn/aosp-monthly/ aosp-latest.tar
解压缩,解压缩完成之后会多出来~/aosp目录
1 tar zxvf aosp-latest.tar
cd aosp
1 2 repo init -u https://aosp.tuna.tsinghua.edu.cn/platform/manifest -b android-10.0 .0 _r17
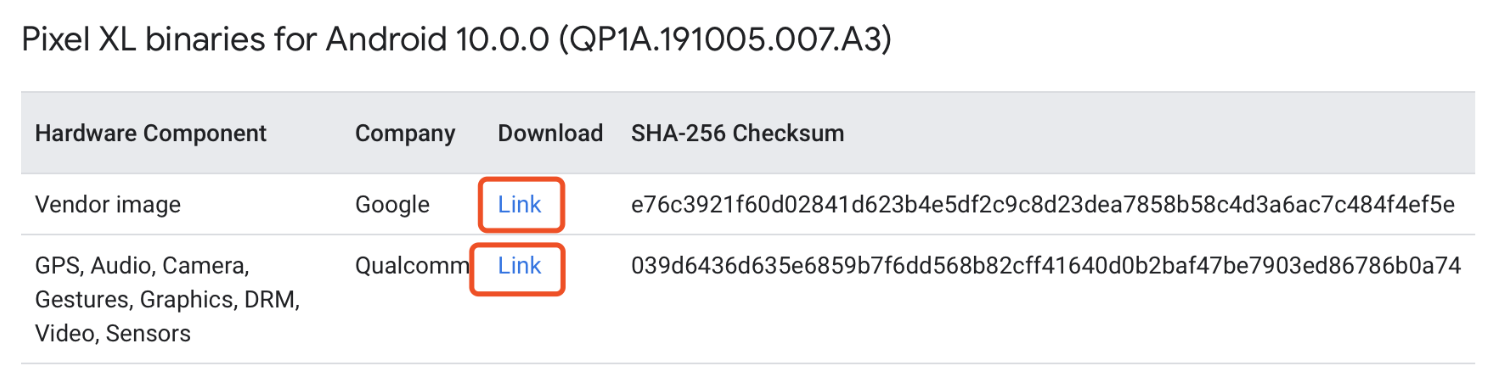
4. 驱动下载 1 https:// developers.google.com/android/ drivers
下载google_devices-sailfish-qp1a.191005.007.a3-a1615a0f.tgz
qcom-sailfish-qp1a.191005.007.a3-191228fe.tgz
下载完成后解压会获得两个.sh脚本文件,运行两个脚本后会生成vendor文件夹,将vendor文件夹拷贝到源码根目录 下
5. 编译环境 1 sudo apt-get install git-core openjdk-8-jdk gnupg flex bison gperf build-essential zip curl zlib1g-dev gcc-multilib g++-multilib libc6-dev-i386 lib32ncurses5-dev x11proto-core-dev libx11-dev lib32z-dev ccache libxml2-utils xsltproc unzip
6. 编译脚本准备 进去源码根目录下
1 2 3 4 5 6 source ./build/envsetup.sh "-Dfile.encoding=UTF-8 -XX:+TieredCompilation -Xmx4096m"
注: 我们可以在aosp/build/tools/buildinfo.sh vendor_buildinfo.sh 这两个文件中直接修改手机品牌的名字,厂家等信息
7. 开始编译 1 2 3 4 5 6 7 8 9 10 make -j6
8. 刷机 回到源码根目录下输入
注 lanch命令为我们设置好了ANDROID_PRODUCT_OUT变量的值为编译文件目录确保它的值和编译后镜像输出目录的路径值一致。如果不一致的话,重新设置ANDROID_PRODUCT_OUT的值与编译后镜像输出目录路径值一致。
其他 fastboot 一、Fastboot
1.1 Recovery模式(卡刷)
在系统进行定制时,编译系统会编译出一份ZIP的压缩包,里面是一些系统分区镜像,提供给客户进行手动升级、恢复系统。需要提前将压缩包内置SDcard,在Recovery模式进行。
进入Recovery方法:将手机完全关机后,按住音量键下(上)+电源键,进入BootLoader界面。用音量加减来控制光标,电源键来进行确认(有的机器只能用音量下键进行选择,上键是确认键)。说明:有的机器可能没有预装Recovery。
1.2 Recovery模式(线刷)
在安卓手机中Fastboot是一种比Recovery更底层的刷机模式。使用USB数据线连接手机的一种刷机模式。这就是所谓的线刷,与Recovery模式相比Fastboot需要掌握一些烧机命令,对于某些系统卡刷来说,线刷更可靠,安全。
二、Android系统分区介绍
模块编译介绍 1 2 3 4 5 6 7 8 9 10 11 from the top of the tree.all of the modules in the current directory.all of the modules in the supplied directories.all local C/C++ files.all local Java files.all local res/*.xml files.
其中mmm指令就是用来编译指定目录.通常来说,每个目录只包含一个模块.比如这里我们要编译Launcher2模块,执行指令:
1 mmm packages/apps/ Launcher2/
稍等一会之后,如果提示:
make completed success fully
即表示编译完成,此时在out/target/product/gereric/system/app就可以看到编译的Launcher2.apk文件了.
重新打包系统镜像 1 编译好指定模块后,如果我们想要将该模块对应的apk集成到系统镜像中,需要借助make snod指令重新打包系统镜像,这样我们新生成的system .img中就包含了刚才编译的Launcher2模块了.重启机器之后生效.
单独安装模块 1 2 我们在不断的修改某些模块,总不能每次编译完成后都要重新打包system .img,然后重启手机吧?有没有什么简单的方法呢?make snod,会节省很多事件.
编译目录介绍 1 2 3 4 5 6 7 8 9 10 11 12 13 14 15 16
lunch aosp_arm-eng
1 2 3 4 5 6 7 8 9 10 11 12 13 14 15 16 17 18 19 20 21 22 23 24 25 26 27 28 29 30 31 32 33 34 35 36 编译类型 | 使用情况 | --------- | ------------------------------------------------------------ | user | 适用于生产环境 | userdebug | 与“user”类似,但具有 root 权限和可调试性;是进行调试时的首选编译类型 | eng | eng 具有额外调试工具的开发配置 |
参考文章 1 2 3 4 5 https:// blog.csdn.net/wengliuhu/ article/details/ 107979371 源码目录介绍// developers.google.cn/android/im ages// blog.csdn.net/u012417380/ article/details/ 73196722 lunch参数介绍// source.android.com/source/ building 官网刷机教程// www.dazhuanlan.com/2019/ 12 /09/ 5 dedf04e496e7 Android8 分区表变化和相关信息